
Notes:
1 – Research:
Gather references for any publication involving layout, to provide relevant inspiration. Look at similar examples to develop an understanding of what works/ doesn’t work/ stands out/ and general composition ideas.
2 – Typographic Terminology:
a. Leading: Space between lines
b. Kerning: Space between characters
c. Tracking: Collective spacing across a line/ paragraph
d. Widow: Singular line that jumps to the top of the next column
This can be solved by extending the column down or reducing the leading.
e. Orphan: Singular words on their own line at the end of a paragraph.
This can be solved by reducing the tracking.
3 – Understand readability:
a. Point Size: Make sure it suits the product outcome/ print/ display.
6-7p – A guideline point-size for footnotes/ captions. A light/grey tone can be used here to improve the readability factor, allowing for a reader to easily distinguish between main body-copy and footnotes/ captions.
8-11p – Reading text/ Main body-copy.
b. Line Length: If lines of type are too long, a difficult/ uncomfortable/ tedious reading experience would be expected. A general rule is to aim for the approximation of 35 characters to a column, and for longer, non-column text, sticking between 35-85 improves reader experience.
c. Hyphenation: Avoid unless producing content for newspapers, or with relevant reason/ purpose. Hyphenation breaks up text inflicting a sense of fragmentation. It is also particularly undesirable in relation to aesthetics, and maintaining harmony amongst the page/ spread.
d. Alignment: Always align left, unless there is necessary reason to do otherwise.
4 – Using the Grid:
Subjecting any layout design/ publication to a grid provides the content with structure. This heightens visual qualities and allows an audience/ reader to easily interpret and understand information in an order as intended. For instance, important visual content can be scaled larger and composed with a consideration of visual balance and negative space to implement a factor of hierarchy.
Basic/ Essential Grid Content:
a. Margins: All content goes inside here , providing the page with a border, in essence.
b. Columns: All main reader text must sit within these.
c. Gutter: Space in-between columns, dividing up text.
Workshop Task


Initial workshop process involved the set-up of margins, constructing a grid structure throughout the document. Using margins heightens aesthetic qualities, allowing the page to ‘breathe’ and implementing a balance of negative space. A total of 6 columns were assigned to each page, enabling for optimum line length per column, therefore improving user readibility.
I applied this guideline to the A-Master, implementing consistency throughout all spreads. I also learnt that you can alter specific pages to implement either a separate master (B-Master) or no master altogether. This is useful if you have a full page image and don’t want a page number or logo on this specific page, but wish to keep it consistent throughout the other pages. It also allows for changes to be made easily without having to change each individual spread.
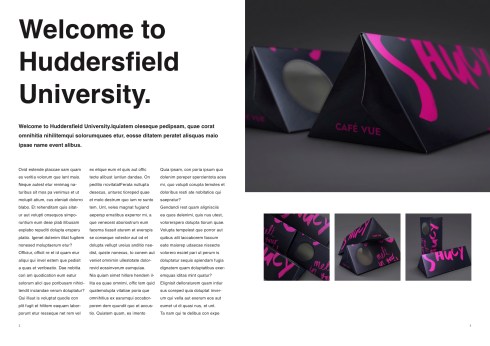
The outcome of this investigation is presented above, utilising learnt layout rules.


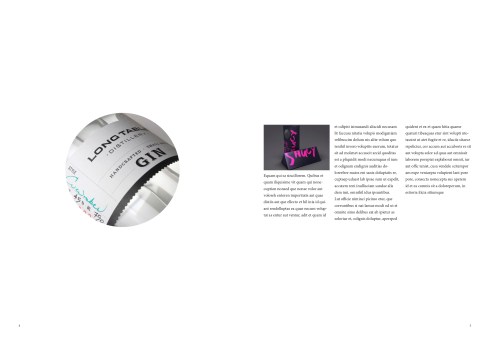
Next, we studied use of the frame tool, as well as the text wrap tool. I learnt that by holding alt and dragging the frame to it’s desired location, you can create a perfect duplicate, again maintaining consistency. Aligning this frame with my previously constructed grid ensured for content to be structured in a neat, aesthteic method. To re-size the visual content to best suit the available frame space, a shortcut of cmd+alt+shift+c was learnt, saving time when resizing multiple images. This framing method can be applied to numerous shapes, including the circle shown in this current experimentation.
Text wrap was another feature learned in this workshop session. This tool allows for an image to be embedded within a body of text, forcing the writing to flow around the picture. This will automatically adjust the formation of the text if the image is moved. An offset value is applied here, ensuring that the text doesn’t flow too close to the image, and instead leaves a border as specified.
Further experimentation/ advancement with this technique informed an ability to apply the text wrap effect to more complicated, intricate shapes and figures. To achieve this, I modified the settings of the text wrap box, as shown below:


To achieve the more intricate text alignment, I used the option to ‘wrap around object shape’ being the third icon along, and amended the contour options to ‘define edges’. This automatically achieves the effect as desired.
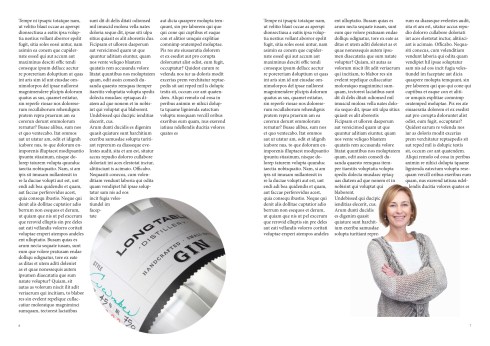
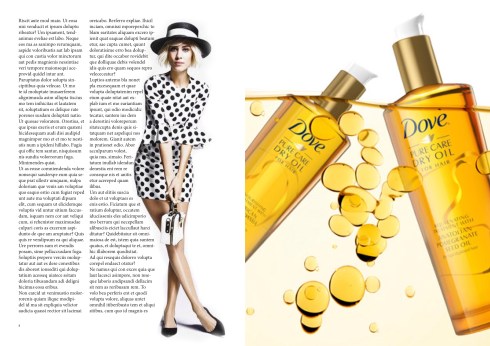
Outcomes above document my exploration of using the text wrap feature, applied into a double page spread utilising place-holder text. This effect could be replicated for feature within a live book or magazine.
Bleed and Export:
To finalise and wrap up the workshop, we explored the aspect of ‘bleed’, applied it to our document and learned why it is relevant.


Bleed is necessary for any pages with colour to the edge of the page. The idea here is that the image will overprint at a larger size than the intended dimensions, to be later trimmed to the required size. When exporting to PDF, bleed marks are applied through the export options to show the total document size within a larger document.
We also learnt about the purpose of different export qualities and their uses. 
Shown above are the PDF export options offered by Adobe InDesign.
The high quality print option is designed for finalised documents, ready to be sent to the printer. This option allows for the better dpi resolution and more intricate details to be confined within the visual qualities in both digital and printed form. However, this level of detail at such high resolution means for very large document sizes, meaning these PDFs would take up far more memory, and be possibly too large to send over email attachment, additionally hindering upload and download speed.
The PDF/X-4:2008 option is a middle-ground result. Quality is maintained to a relatively high standard, while the file size is kept relatively small. This document size is ideal for small projects and university presentations.
The smallest file size option gives noticeably reduced image quality, but is compressed into the smallest possible file. This makes it ideal for emailing out for feedback/ a general check-over with regards to progress. The file will send quickly and take up minimal space within email attachments and on a hard drive in general.
